Overview of network editing
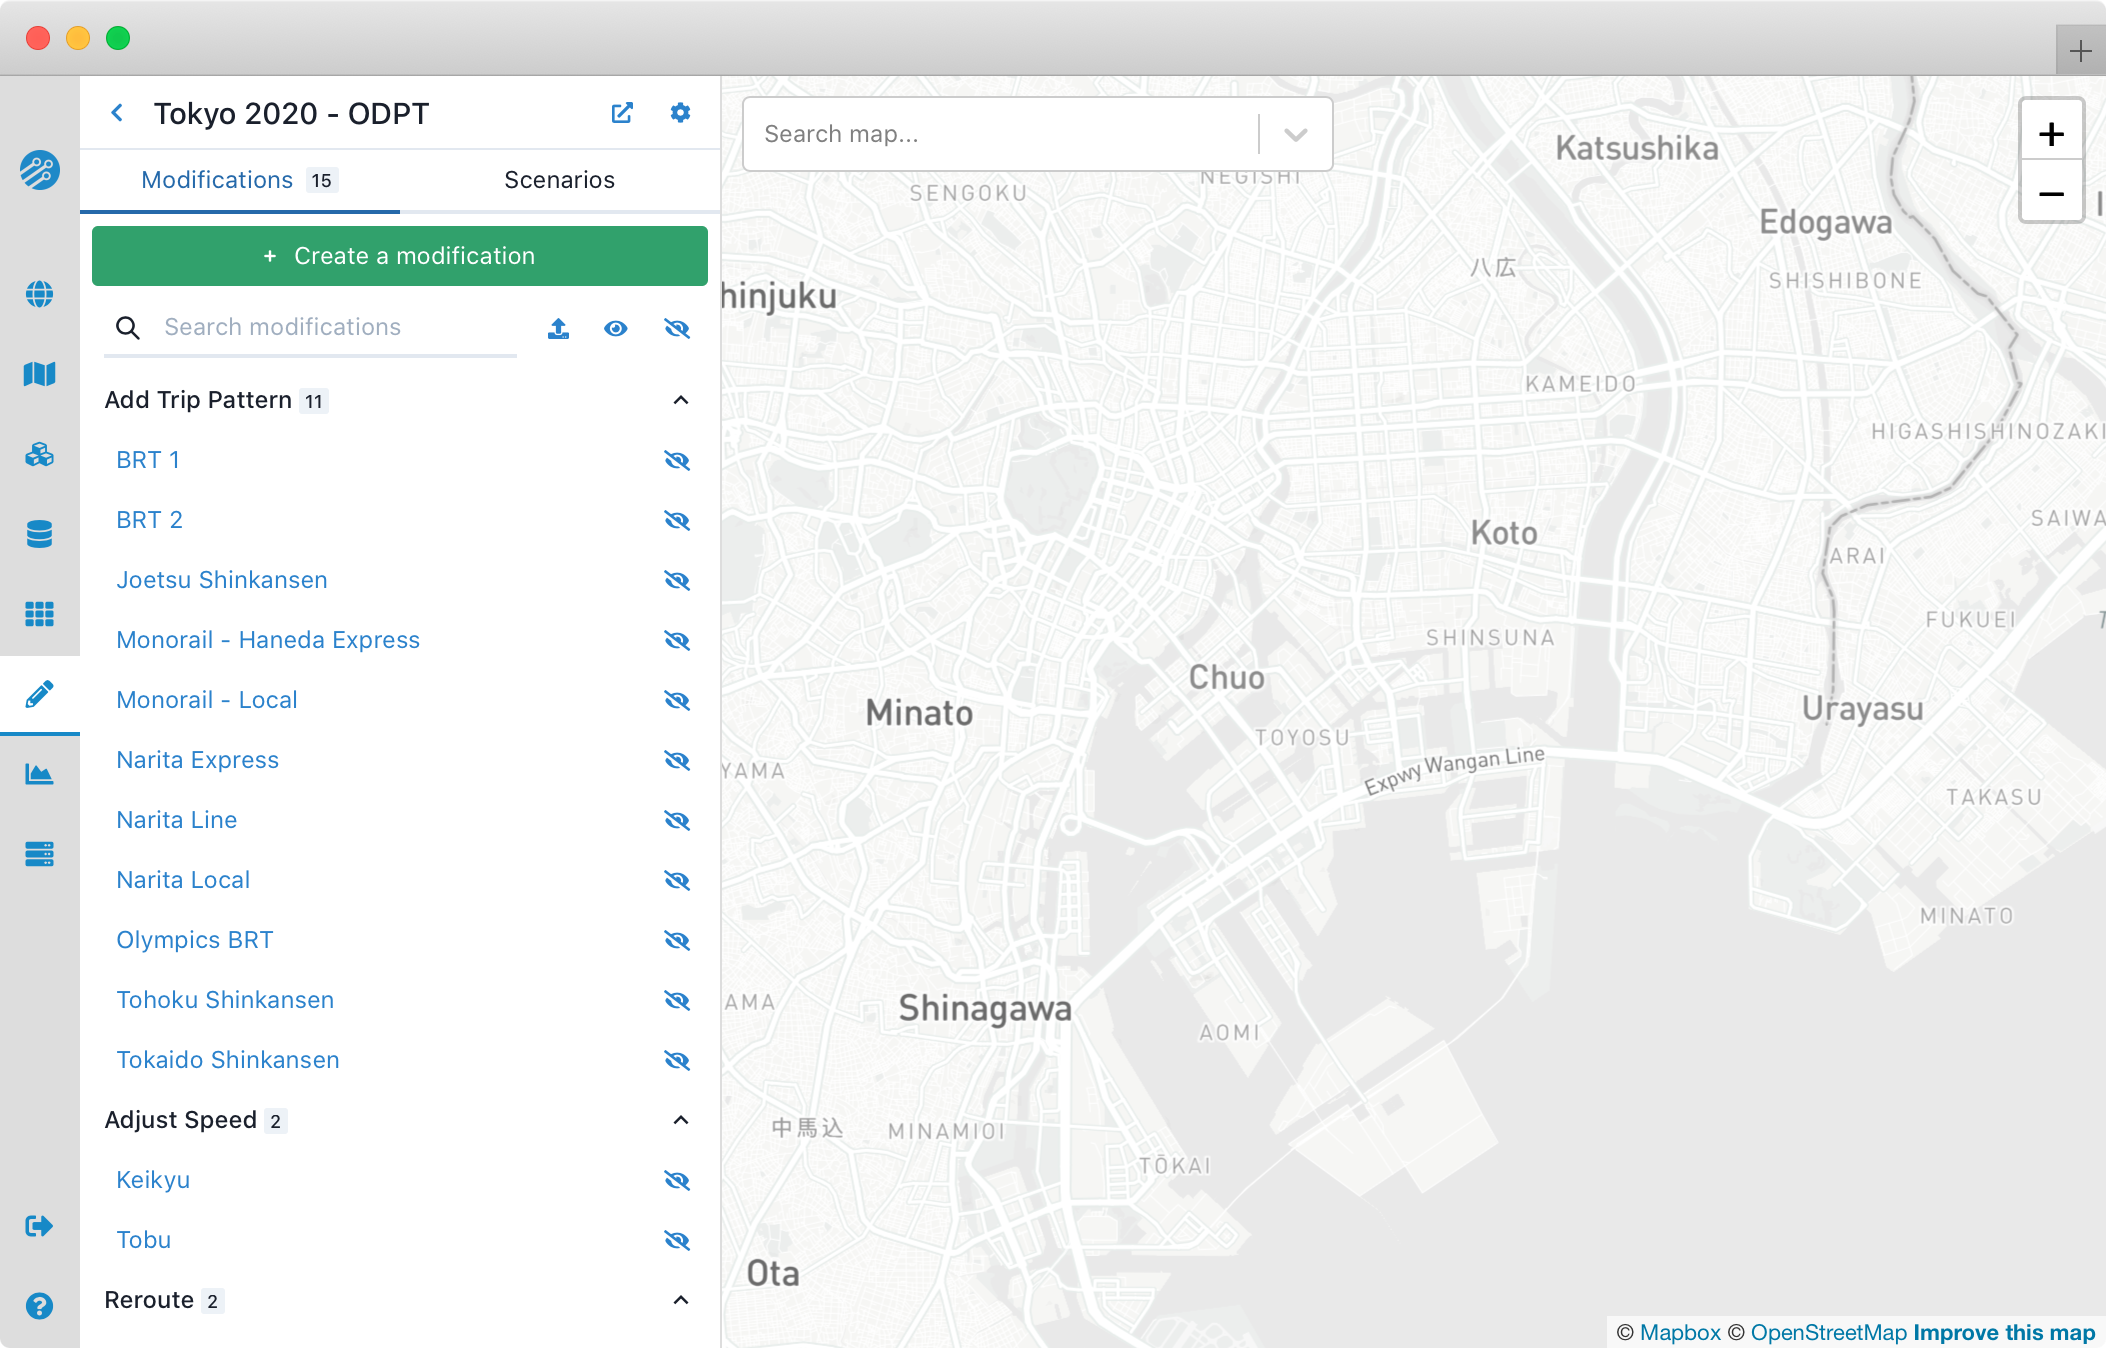
After selecting a project, you will arrive at the modifications page, shown below. Each modification represents a single operation on the baseline network (for example adding a line, or adjusting the speed of an existing line) and can be activated in multiple scenarios. Scenarios are a way of packaging isolated modifications into meaningful groups representing changes to the broader network. For example, you could create a scenario representing each of several funding scenarios with one for service cuts, one for extended service and so on.
If you expect multiple people in your organization to be using Conveyal at the same time, you may want to create projects for each of them. Modifications can later be imported into a project from other projects based on the same network bundle (See Managing Modifications.
Create a new modification
To add a modification, first navigate to the modification page (the icon). If your project is already selected you should see the following button below the project name. Otherwise you will be prompted to first create or select a project.
Create a modificationClicking on this will open a window prompting you to enter a name for the modification and to select a modification type.
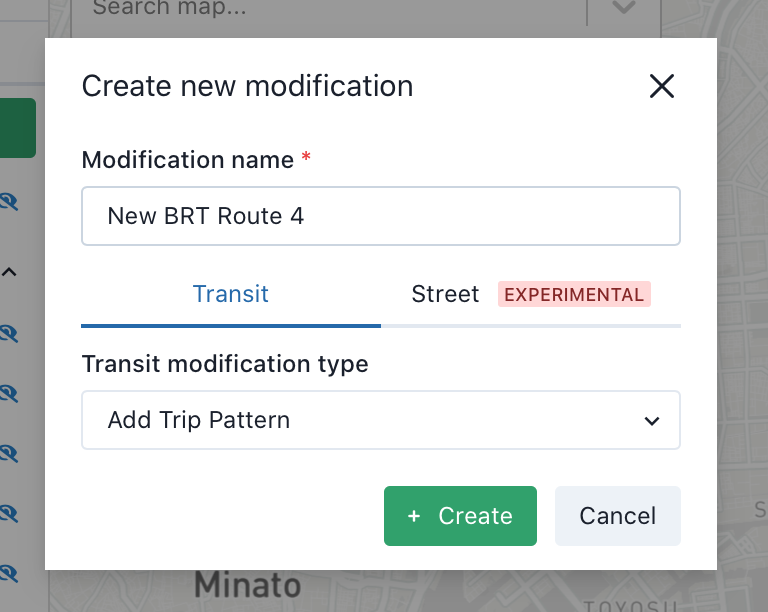
Try to choose a descriptive name that will be unique to the chosen modification type. After clicking create you will be taken to a page with options specific to your chosen modification type.
Once created, all modifications can be managed using the icons at the top left of the screen:
- Rename
- Edit JSON
- Copy
- Delete
- Locate on map
Once changed, modifications will show options to Save changes and Revert unsaved changes. Clicking the button at the top left of the modification panel will save changes and take you back to the project view.
Create a new scenario
From the modifications page, you can also create and edit scenarios. A scenario is used for packaging modifications into meaningful groups representing broader changes to the network.
Click on Scenarios to switch from the Modifications list view to the Scenarios view. This view includes buttons to Create a scenario and Show table editor. The Scenario table lets you control whether modifications are active in certain scenarios.
Below these buttons, you will see a list of scenarios. The first two scenarios are always the same: No modifications, which represents the represents the baseline network, and All modifications, which includes all modifications in the project. Beyond these locked scenarios, you can create custom scenarios to allow grouping modifications in different combinations. Next to each custom modification, you will see options to:
- Rename
- Copy
- Delete
- Display active modifications on map
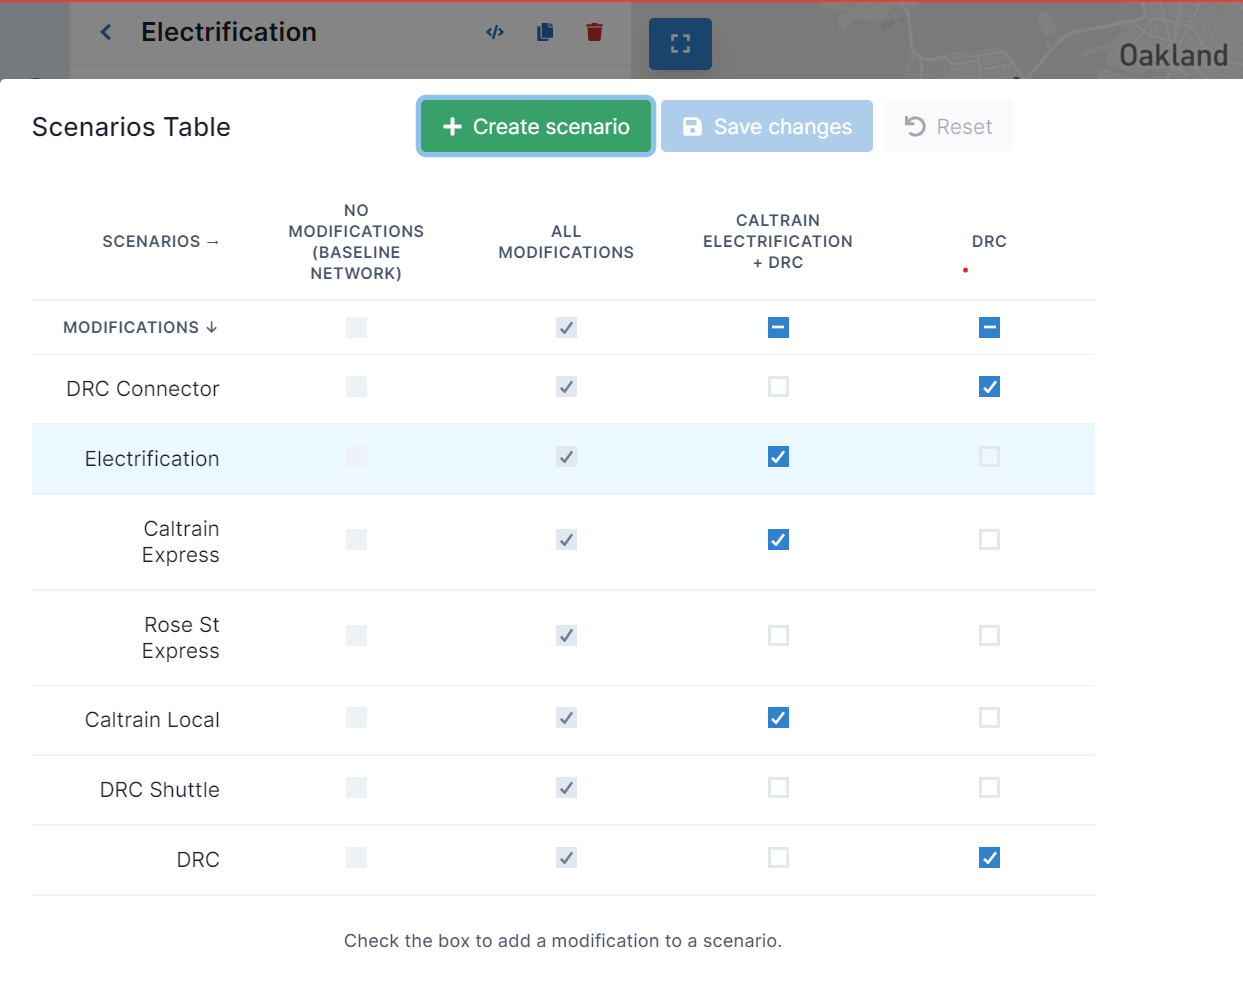
Activate a modification in a scenario
If you need activate or deactivate a modification in a custom scenario, from the Scenario view or the detailed view of a single modification click Show scenario table editor.
You can then use the checkboxes to activate/deactivate modifications as needed.